Tutorial - how to Build your first level
A Quick First Level to get going! A companion DeePsea feature, Tutorial Interactive Demo can be selected from the Help menu to give you an even quicker interactive demonstration of DeePsea’s features. Highly recommended for learning DeePsea drawing.
Select print from the help screen and make a printout of this tutorial so you can mark the steps.
Refer to Graphics - Drawing Graphics Tutorial for a quick overview of drawing on walls.
Read the introduction to this help for some basic terms,(see A detailed look at WAD files ) adjust the default textures if you are using DOOM (F5 menu), and adjust the display speed by pressing [ to slow down and ] to speed up. The map will fly all over the place if you don't set the speed to around 10. The speed is displayed on the bottom of the screen as Speed 10.
To make a quick first level just follow the steps below. Please make sure Snap-to-Grid is on. Press the forward slash key / to toggle. Set the grid size at 8 by pressing G or Shift+G. The grid size is displayed on the botton of the screen as Grid 8.
We will make first make a room, then a second room, connect them with a corridor and put a door in there.
Let’s Start:
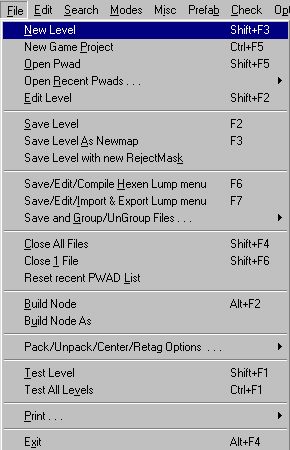
1. Press alt+F or Click File on the top menu bar (selects File menu).
2. Press N or click New Level (we are making a brand new level). This is the dialog you just brought up:
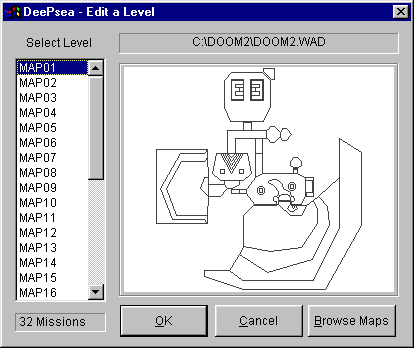
3. Next you see the following dialog. Press OK or press Enter. The will be the level name you are making. If you wanted a different name, you can choose from any shown. It’s easy to rename the level to anything later.
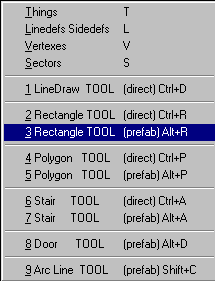
4. Press F9 to bring up the following prefab popup menu and select the Rectangle (prefab) as shown below.
5. The dialog that came up is shown below. Enter 512 x 512 in the size boxes and click OK

6. Place the mouse cursor in the middle of the screen (the exact area doesn't matter), click the Left mouse button and view the upper right corner of the screen to make sure it's about 512x 512 and press Enter or click the Left mouse button again.
7. Press the Right mouse button (or press Esc) to exit Tool mode.
8. Press C to clear the selected green lines. This is what you should see on your screen:

9. Press T to go into Thing Edit mode.
10. Move the mouse cursor inside the rectangle and press the Ins key. This just inserted a Thing where the cursor was located.
11. Press Enter or Right mouse click. (brings up Thing menu).
12. Press T (or press Type button) - we are going to change the type of thing.
13. Select Player Start/Teleport
14. Select Player 1 Start This is what should be on your screen:
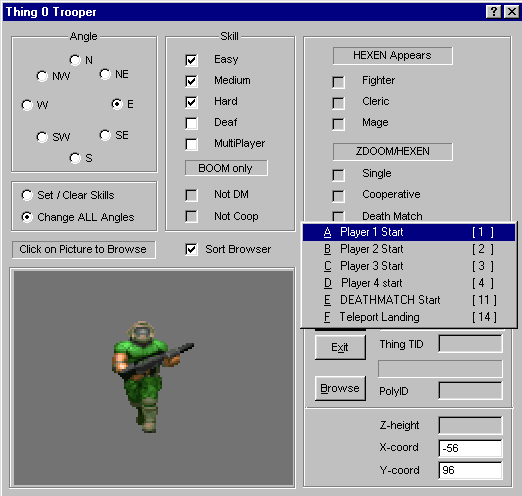
15. Press OK or Right click to exit menu.
16. Press Alt+F (or select File from menu)
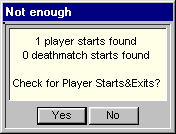
17. Press S or click Save Level (Save the file). Click No to the following for now:
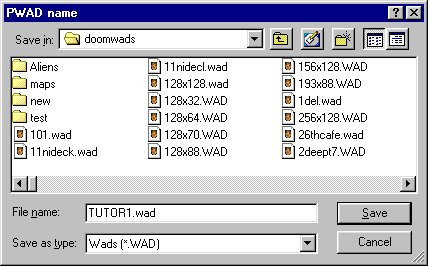
18. Edit the file name TUTOR1 in the name box and press Enter or click OK.
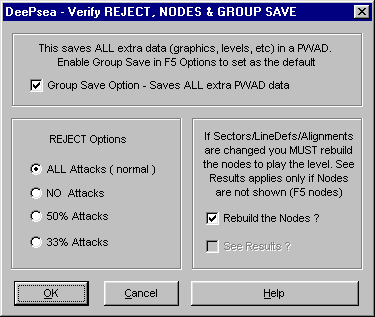
19. Press Enter or click OK to the next dialog. Saves the level and builds nodes.
This isn't much of a level, but you can see that it WORKS!. You can play it using the -file option for DOOM/ HERETIC/HEXEN/STRIFE. Or you can play it directly from DeePsea.
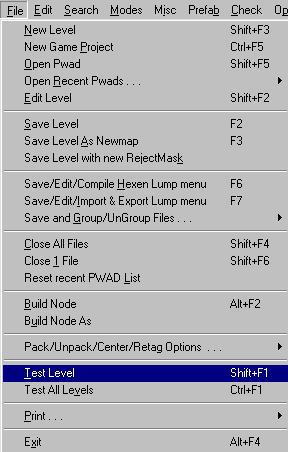
20. Select Test Level from the File menu
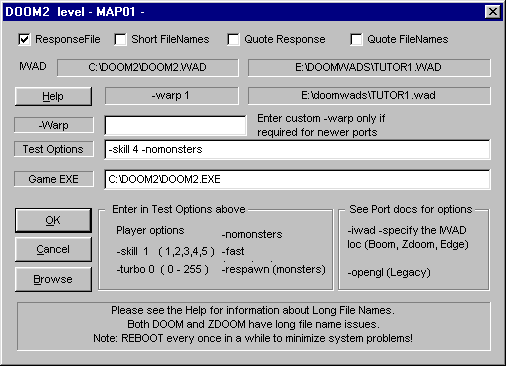
21. This is the testing dialog. If required, change the location of the DOOMx.EXE using the Browse button and press OK or Enter to test your level.
Expand your First Level!
Now lets see how easy it is to make your level more than just one room. Have at least a Zoom size of 500 so you can see what you are doing. Press the + or - keys to change the zoom.
1. Select the level you made above (this is automatic, if you didn't switch levels!).
2. Press Ctrl+D and draw another rectangle above the rectangle you made. Draw the rectangle clockwise. You could use the rectangle tool again, but then you wouldn't see how easy drawing really is.
3. Make the bottom line that is closest to the original rectangle parallel to the top line of the old rectangle. If it goes at a slant you may have trouble hitting it later on.
a. Press the Left mouse button to start drawing, then move left, press the Left button again, move up, etc, until you have 3 sides (see below).
b. Press the Right mouse button to finish the second rectangle. You are still in LineDraw mode, so don't Right click yet!.
4. Hopefully this is what you have on the screen:

5. Now let's CONNECT them! Use the picture show below to guide you.
a. Place the cursor on top LineDef O1 (the top information in green will say On Line 0) and press the left mouse button. The line should turn RED and you should see a Blue dot. If this did not happen, Right click right now and try again!
b. Move up and place the cursor on top of LineDef N1 (again Online # - # may vary) and Left click again. As before, the line should turn RED. If you miss this time, you should start over, not that you have to, but we'll have detail overload at this point. (To start over, go to the File menu and select Edit level, THIS one!)
c. Move to the right about 128 and Left click to create v3. Make sure the line really split there!
d. Now move down to LineDef O1 again and place v4 on top.
e. Right click the mouse (makes the last line)
f. Right click again to exit LineDraw. That's it!

6. Let’s make sure you did everything right. Press F10 and select 2 - check all sectors... just to be sure!

7. Press Alt+F and save the file as before. Saves the level and builds nodes as you did the first time.
For a Really Good Time, add a Door!
I'm going to assume that you know what to do getting the last level loaded so we resume where we left off.
There are 3 ways to make Doors, this is the easiest to start with, although later you may prefer to use the other methods.
1. Place your cursor in above the middle of the corridor made above. The rotation places the object farther down, so by placing it higher we adjust for where we want it.
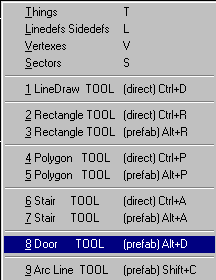
2. Press F9 and select Door
3. Now enter 16 and 64 in the following dialog and press OK
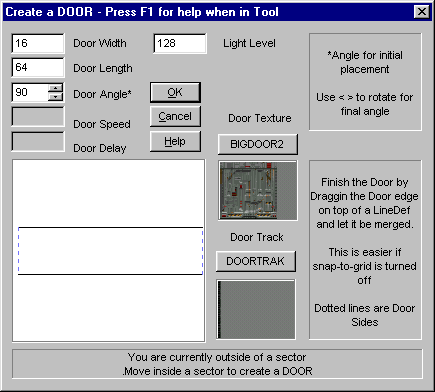
4. Press the Right mouse button to drag the door into position. All the sides must be contained within the corridor. It should be close to what you see below. The exact position is not critical, since that is easy to adjust. Press F1 help for the command used to interactively resize the Door.
5. When you have it close enough, press the Left mouse button to place the Door, then press the Right mouse button to exit.
6. Press C to clear the selected green lines. Here’s what you should have on the screen:
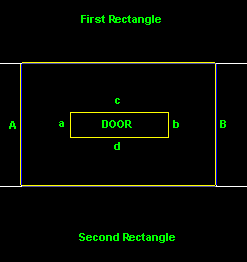
7. If door lines a and b are not parallel to lines A and B we need to move the vertices a bit. Go into Vertex mode (press V) and place the cursor on top of the offending vertex. Press the Right mouse button hold it down) and move. When the line is parallel let go. Adjust any other sides now.
8. Enter LineDef mode (press L). Place the cursor on top of Door LineDef a and press and hold the Right mouse button. Now drag the a LineDef over on top of the A LineDef. You see why the lines had to be parallel?
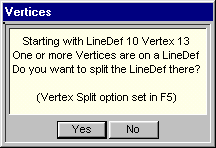
9. Release the Right mouse button, you should get 2 messages as shown, one about splitting the LineDef and one about merging LineDefs. Reply Y to both.
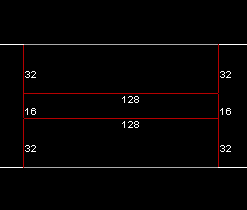
10. Repeat the above using LineDef b and B. This is how your finished door should look:
11. Press Alt+F and save the file as before. Saves the level and builds nodes as you did the first time.
If you're Cooking, lets' make another Room inside the area!
We are going to make another room inside the top Room we made before, Rectangle 2 (you can duplicate what's shown here and do it below too).
1. Place your cursor at the X as shown below and press Ctrl+D to enter LineDrawing mode. Press the Left mouse button to place a vertex at the X and draw the area shown: move left, down, right, up, etc. When you get to Y you can Right click and the line will be finished to X.
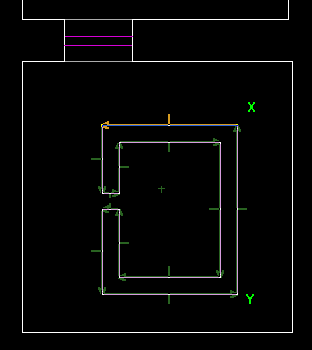
2. Adjust the spacing so you can fit. Go into LineDef or Vertex editing mode (press L or V), move the cursor on top of the object to move, press and hold the Right mouse button down and then move the mouse. You will see the objects move as your drag them.
3. Press Alt+F and save the file as before.
4. You can now now put a door in the opening as described earlier.
Hopefully, this gets you going. Understanding how the pieces fit together is the most difficult part to learn. Once it hits you between the eyes, you will reap great benefits from the understanding, so don't give up!
(Stop my head hurts..........)
Please refer to the following for more:
Tutorial Levels See Help Index topic for more introduction and documented sample levels
HEXSPECS HEXEN script specs (in this help file)
SCRIPTS.DOC External file - Introduction to scripts
SCRIPTS.ACS External file - sample HEXEN script
HEXENTUT.ACS External file - sample HEXEN script
See DEEPEXAM.WAD for examples of the following :
Doors
Select LineDef mode Misc (F8) create Door from 4 LineDefs.
Select prefab (F9) create Door for a prefab door that you drag/stretch to fit your space.
Pools
Select prefab (F9) create Rectangle or Polygon and turn the Pool option on.
Lights
Select prefab (F9) create Rectangle or Polygon and turn the Light option on.
Windows
Select prefab (F9) create Rectangle or Polygon and turn the Window option on.
Lifts
Select Sector mode then Misc (F8) , create lift from sector.
Teleporters
Select prefab (F9) Rectangle object and select Teleport Exit/Entrance pads.
For DOOM and HERETIC:
Connect the Teleport Exit to the Entrance pad using the Tags.
For HEXEN:
Connect the Teleport Exit to the Entrance pad using the same Tid in both the LineDef and a teleport Thing.
You don't have to use an Entrance pad, any Sector will do, this is mainly for looks.
Stairs/Rising Stairs
Stairs, see Objects, stairs.
For Rising Stairs, set the step height to 0. Make some LineDef one of the rising stair LineDef types and using the Tags, connect the LineDef to the first sector of the stair (see Introduction on Tags). All the stair steps (Sectors) have a height of 0.
For HEXEN only, make the next Sector (not the first Sector you tagged to the LineDef) to type Stairs Special 1, then the next one to Stairs Special2, the next one to Special 1 and so on, back and forth.
Secret Areas
This is just a Sector Type.